DIY Electric Fireplace
This post may contain affiliate links, please review my disclosure policy.
Hey friends! If you’re here, you probably have a room without a fireplace and have researched having one installed – and now know that it’s crazy expensive to do so! So today, I’m sharing sharing how we built a DIY brick fireplace with an electric insert for less than $400.
Installing an electric fireplace is one of the most impactful changes we’ve made to our home, and 1000% worth doing. Let’s get into it!


We decided to build a DIY fireplace based on the fact that this room is where we spend the majority of our time with our kiddos. And we wanted to feel as cozy and calm in this room as we do in our den. We started by adding a shiplap wall early this year, and after sitting with it for quite some time, the room just needed something more.
I opted for brick because I believe it’s timeless and withstands trends. Here’s how we did it!
This post includes affiliate links. For more info visit my disclosure policy.
Tools & Supplies Needed For DIY Fireplace:
**How much of what we used is based on the measurements we built to, so you need to adjust accordingly if you’re changing it up!
WOODEN FRAME:
– (10) 2×4’s
– Hardwood Panel
– Spax Screws
– Drill
– Brad nailer
– Wood glue
FIREPLACE:
– 27″ Electric insert that we found on marketplace (Bello’ Brand)
– 140 standard size clay bricks (you can get them from a building supply company to save money!)
– Quikrete mortar mix
– (2) steel angle bars for support
– Nitrile coated gloves
– (2 or 3) 5 gallon buckets for mixing mortar and being able to bring it inside easily
– Garden hoe
– Brick hammer or small sledge hammer
– Brick chisel
– Drop cloths
– Tape measure
– String
– Shop vac
– Drill and drill bits
– Painters tape
– Trowel
– Tampico Brush
FIREPLACE “PAINT”:
– DryDex Joint Compound – https://www.homedepot.com/p/DAP-DryDex-32-oz-Premium-Lightweight-Low-Dust-Joint-Compound-12385/302976074
– Rubber Baking Spatula (for application and getting into the mortar grooves)

MANTLE:
– (4) 1 in. x 10 in. x 6 ft. pine common boards
– (1) 1 in. x 6 in. x 6 ft.
– Two boards exactly 2 inches wide since we had a 4 inch gap on the sides. You could also do 1 board exactly 4 inches wide. Factor this for both sides.
– Minwax White Wash Pickling
– Behr Exterior Stain in Cordovan Brown (we used the smallest container) –https://www.homedepot.com/p/BEHR-Premium-1-gal-ST-104-Cordovan-Brown-Semi-Transparent-Waterproofing-Exterior-Wood-Stain-and-Sealer-510401/300845971
I have since sanded and re-stained our mantle! Hence why you see two different colors in the photos. We have also since added built-in storage to each side. This is the second stain option below!
Mantle Stain Option #2: (I explain this further below!)
– Minwax White Wash Pickling
– Special Walnut
– Weathered Oak


BEFORE OUR DIY FIREPLACE:

This project cost us around $360 in total (this is still crazy to me!! Some inserts cost this much!), but we did have some of the tools that were needed already on hand. We were also able to find an electric insert, new in box, off of Marketplace. Depending on how many tools you need to buy or rent, and how much you spend on insert, this could cost a bit more.
I have absolutely no experience with masonry and my husband has just a little, so we had to experiment a bit in getting the bricks to line up evenly. And also breaking the bricks in order to use smaller pieces when necessary. I think we finally got the hang of that at the very end. Isn’t that just how it goes!
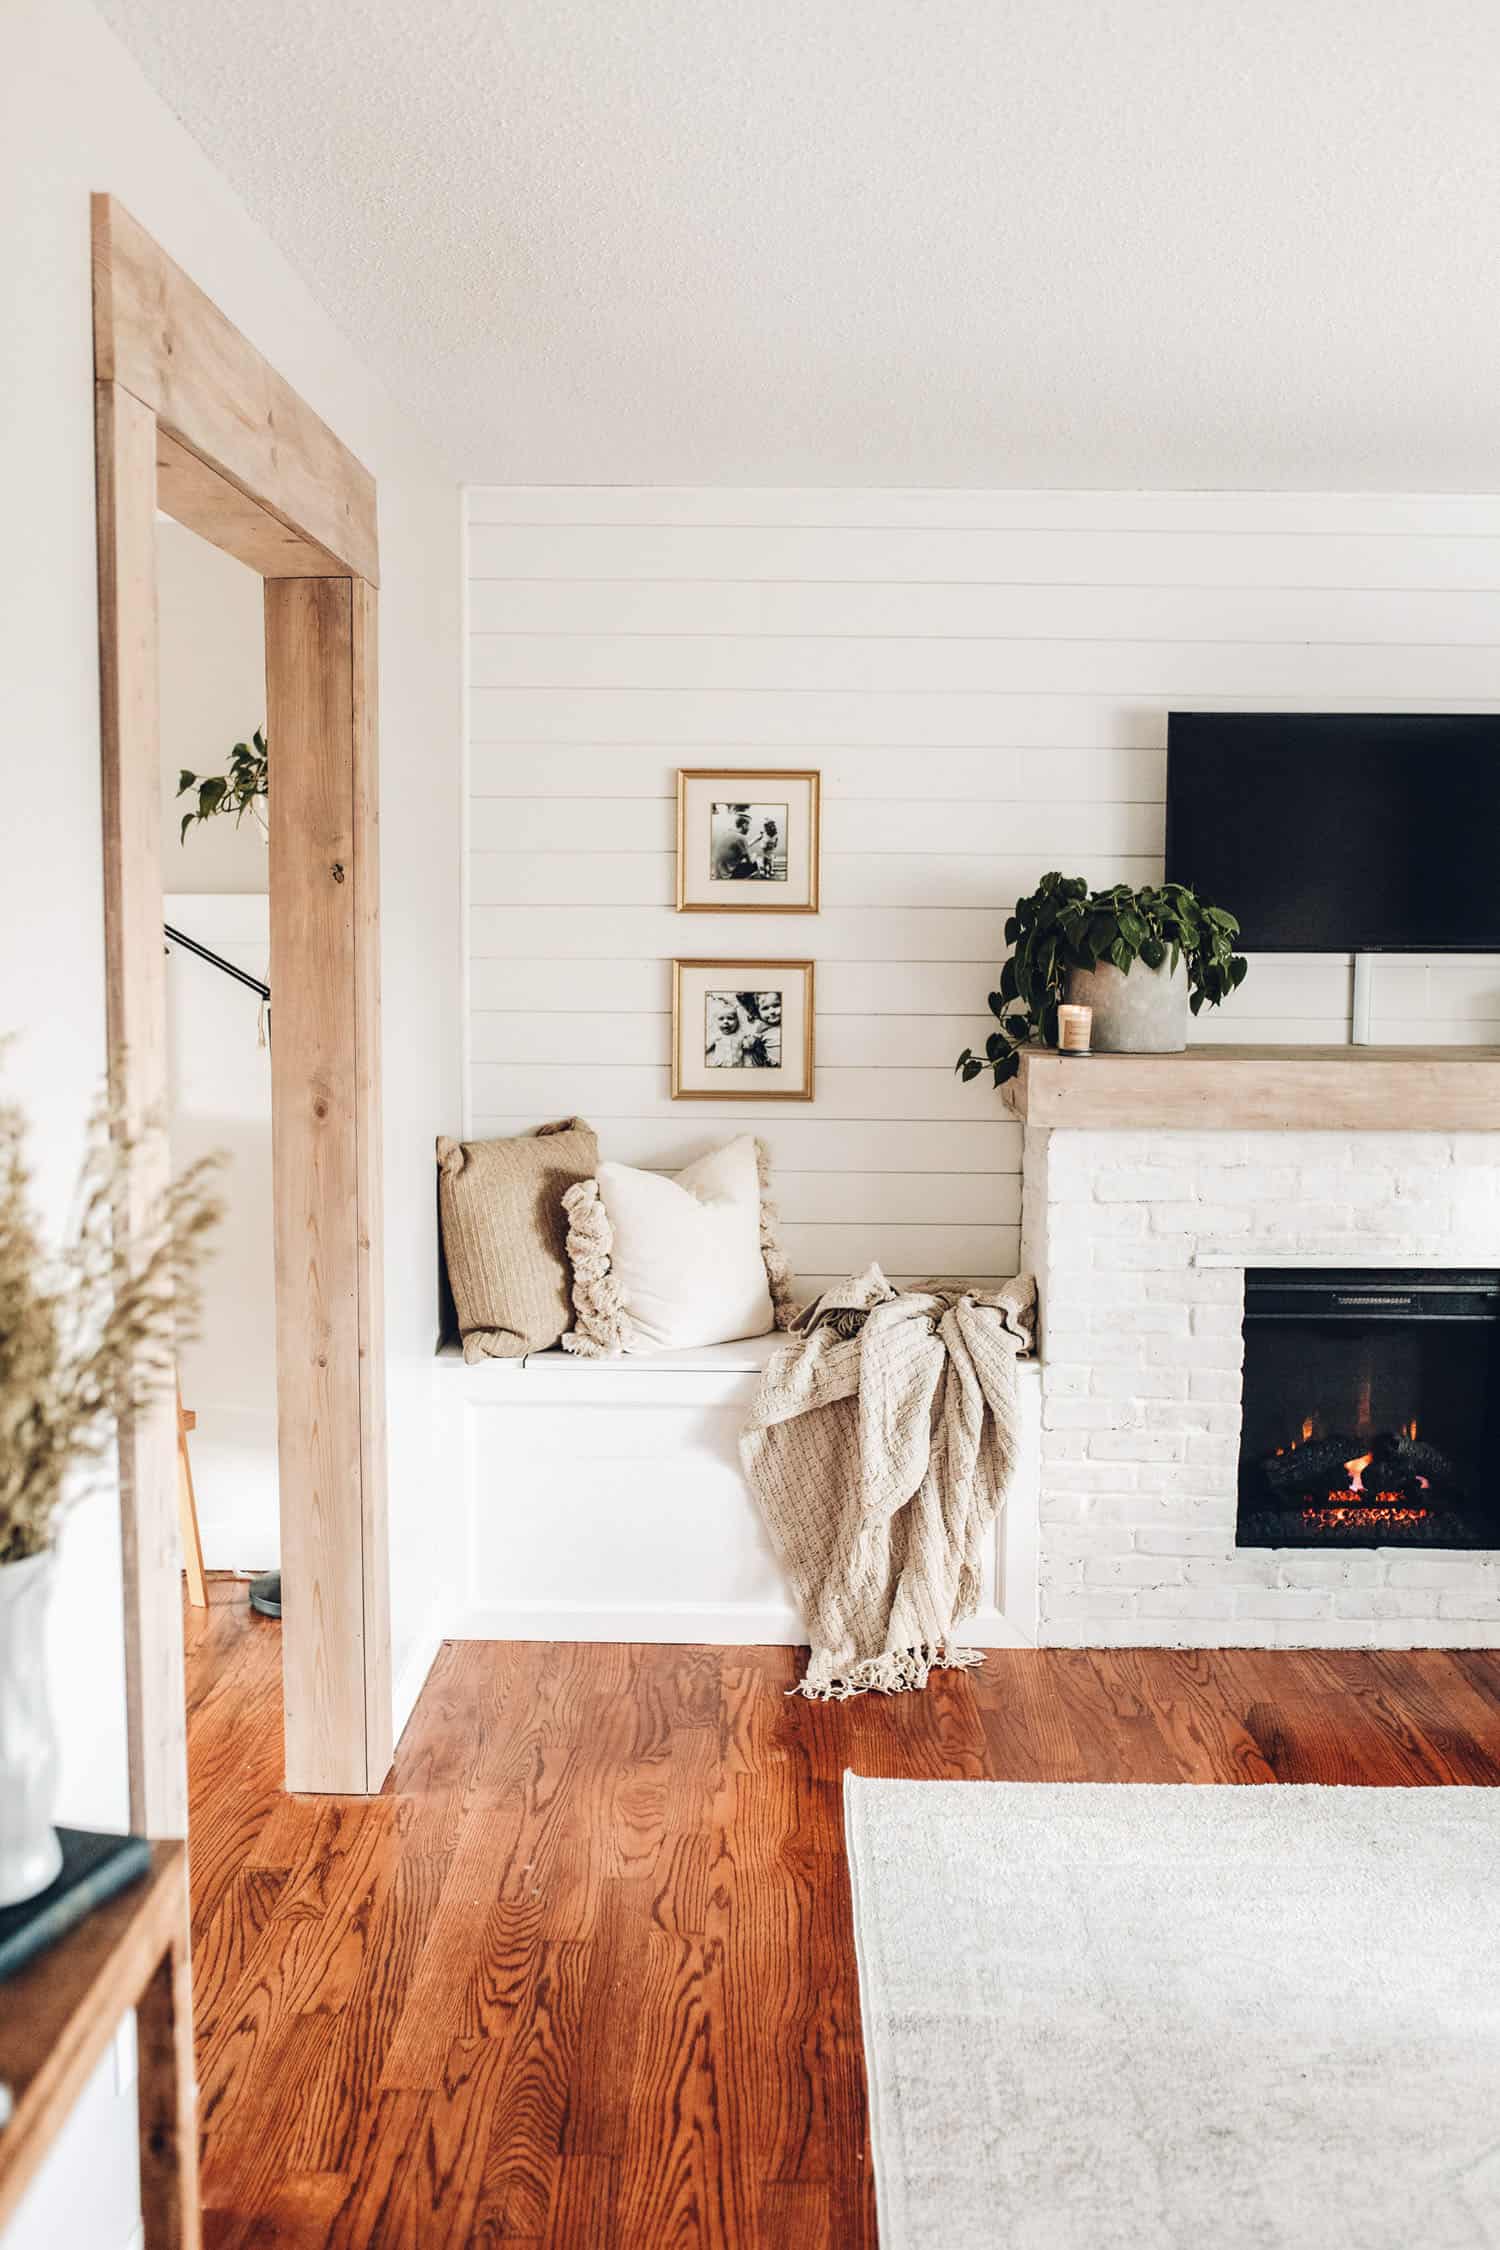
Here’s the DIY Fireplace in action. Be still my heart.
How to Build Electric Fireplace Wall
1. Remove baseboard from the wall that the fireplace will be built. We chose to cut out the specific section of our baseboard that the fireplace would cover, but in hindsight, Dave says he would rip it all out if he could do it again. We ended up replacing it all.

2. Measure out the width/depth/height of your fireplace. We chose to make ours the size of our Ikea 8-cube storage shelf (it was previously in the center of this wall and I liked the space that it took up). So our fireplace is 58in long x 42in high x 12in deep. Obviously, this might be too big or small for your space, so you can change it up accordingly.
3. Build a frame out of 2×4’s, taking into account the width that the bricks will add outside of the frame.


4. Attach your hardboard paneling around the outside of the frame — sides and front. (High Density Fiberboard HDF).
5. Lay your brick around the fireplace. As you are laying the brick, check every row as you go to ensure it’s level (we learned this the hard way). Do this by laying a flat 2×4 across the layer and adjusting mortar as necessary.
We used 2 steel angle bars above the opening of the fireplace to support the top. Both bars across the top — one on the outside edge and one inside to form a bridge for the bricks to rest on.

6. Once the brick was laid and the grout had dried for over 24 hours, I chose to go over the brick with joint compound (linking what we used below). I followed this tutorial, but went heavier with it to provide more coverage! Don’t worry — it won’t stay pink!


7. If you’re following the above tutorial and going for the same look, I went back and went heavier in certain spots with the joint compound after the first coat had almost dried to provide more texture. I would suggest keeping the first coat of this light, and then adding to it if you’d like it to be darker.

8. Build your mantle! This is what you’ll need for if you’re following our specs. If not, you’ll need to adjust accordingly.
– (4) 1 in. x 10 in. x 6 ft. pine common boards
– (1) 1 in. x 6 in. x 6 ft.
– Two boards exactly 2 inches wide since we had a 4 inch gap on the sides. You could also do 1 board exactly 4 inches wide. Factor this for both sides.

9. Stain your mantle! This is what I used —
– 2 coats of Minwax White Wash Pickling
– 2 light coats of Behr Exterior Stain in Cordovan Brown (we used the smallest container)
**EDITED TO ADD: I have since sanded and re-stained our mantle with white wash pickling, special walnut, and weathered oak. I have a tutorial on this stain combination here.
This is the first combo of white wash and Cordovan Brown:

NEW STAIN:


10. We chose to leave our mantle as a removable top. It’s heavy enough that it’s not going anywhere, and this way, we can remove it when we need to get to the electric insert! So, yes, it’s actually just sitting on top of the brick and not attached!
We caulked around the fireplace to keep it steady and also give it a seamless look, but can cut through the caulk when we need to remove the top.
We have also since added built-in benches on each side of the fireplace.
Before built-ins:

After built-ins (and 2 years of style change) 🙂

Words of Advice for Building Your DIY Electric Fireplace
So now, words of advice… we have many! Please, PLEASE learn from our mistakes, lol!
1. Make sure that you are building the fireplace right next to an electric outlet. You will need to leave a gap in the brick on the side closest to the outlet for cords to run in and out of.
2. If possible, spec your dimensions to help in having to cut as few bricks as possible. Ours would have gone quite a bit faster if we had been a tiny bit smarter about dimension.
3. You do not need to be an expert builder or be awesome at masonry to do this! Dave suggests measuring your space, deciding on how big you’d like the fireplace to be (height and depth), and then drawing up a plan for the frame. As mentioned earlier, we chose the size of ours based on the 8 cube ikea shelf that the fireplace was replacing.
4. Frame out your center fireplace opening and lay the brick up against it. We didn’t build a frame around the fireplace opening — Dave just measured and built to that line, and we had some problems with our center opening not being straight.
5. Plan for things to be messy and the room to not be usable until this project is done! There was a trail of mortar dust from this room to the garage that was completely unavoidable, as well as as mortar all over the surrounding floor (even though we used drop cloths). It all mopped up pretty easily, but I would still plan to cover and tape off the surrounding floor very well.
6. Check every row as you go to ensure it’s level. Use a flat 2×4 across the layer and adjust mortar as necessary.
7. Don’t get caught up on “perfection.” I specifically picked out the chipped and imperfect bricks to face the front, to give it a more rustic look. Some of our bricks don’t line up perfectly, and we even had to go back and straighten out some areas with grout to make it look like we didn’t get way out of line, lol! The point is… if it gets a little lopsided, don’t freak out! Add some grout and move on. Once you paint (or whatever you’re going to do at the end), no one will ever notice.
If you’ve made it this far reading about how to build a DIY Electric Fireplace….just go for it!! This is my favorite project we’ve ever done, and I don’t think I’ll ever stop appreciating the timeless coziness and character that it gave this room! Best of luck!
xoxo,
