How to Build a DIY Pergola on Concrete
This post may contain affiliate links, please review my disclosure policy.
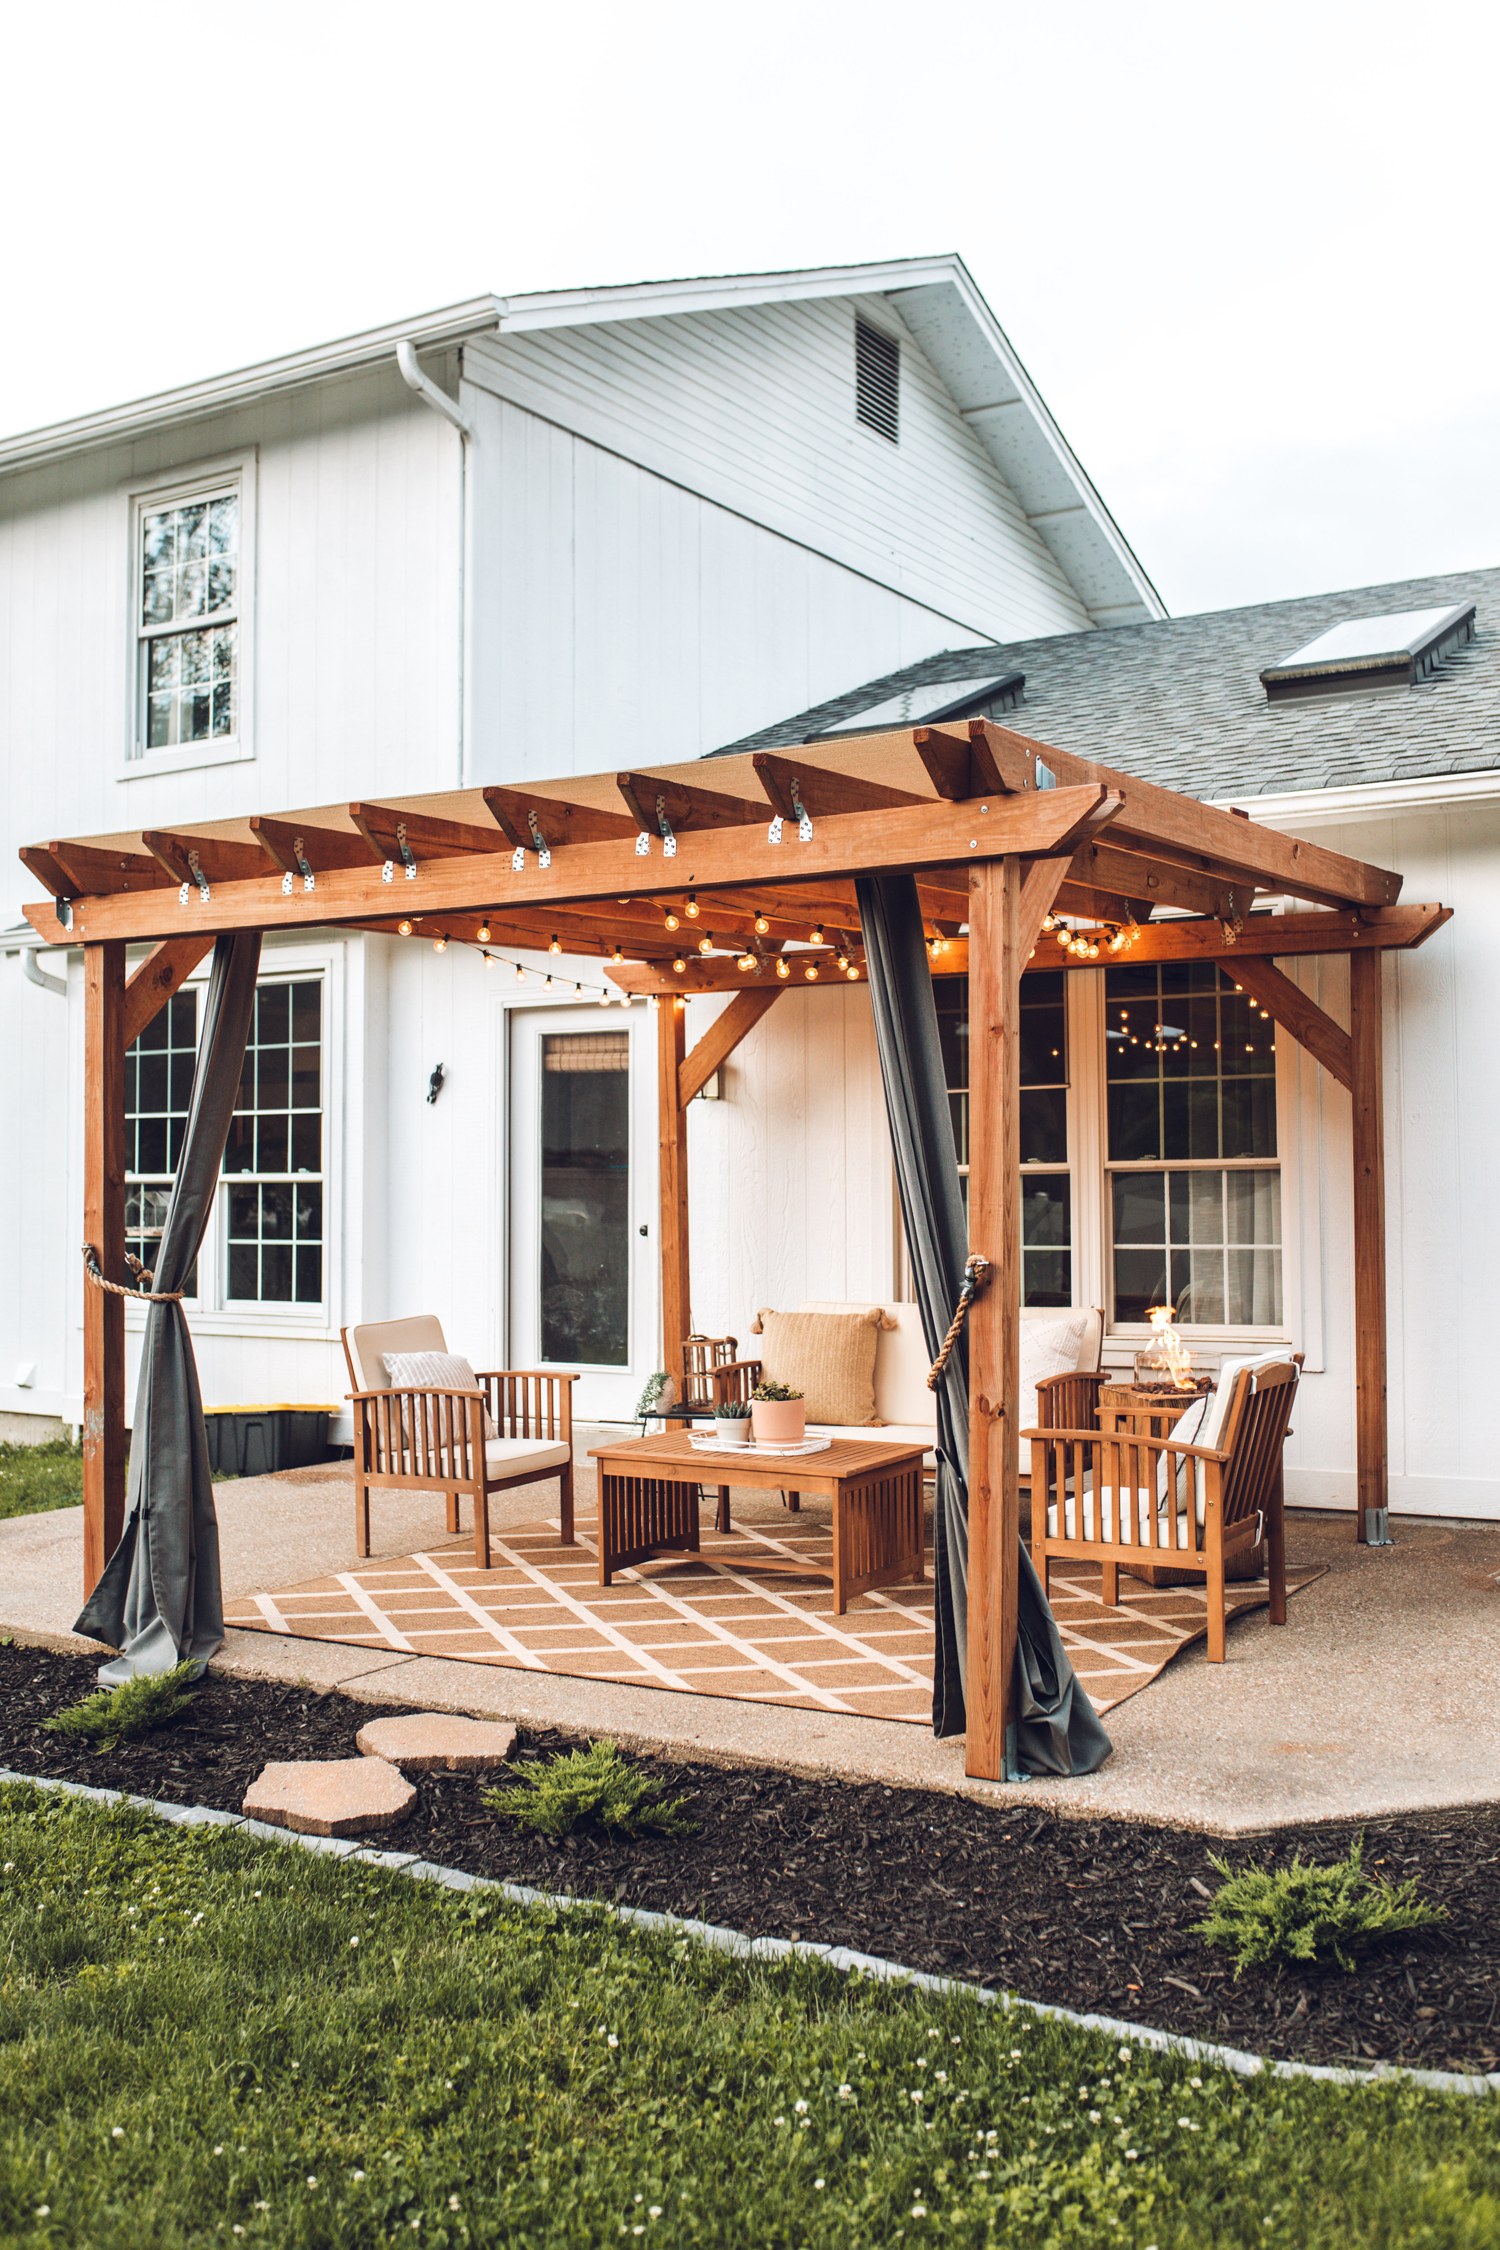
Hi friends! Today I’m sharing how we to build a diy pergola on concrete! Last summer, we finally decided to add some shade to our shadeless concrete slab patio by building a pergola on top of our existing patio.
For those of you that want numbers before you even start diving into this, we spent $400 building this. And in my opinion, for what our pergola has done for our backyard, this was absolutely $400 well spent! I am aware that since the writing of this post, lumber prices have gone up. I cannot give an accurate estimate for what this will cost now, but I can say that we created this plan to be as budget-friendly as possible.
Here is how we transformed our outdoor space with our diy pergola project!
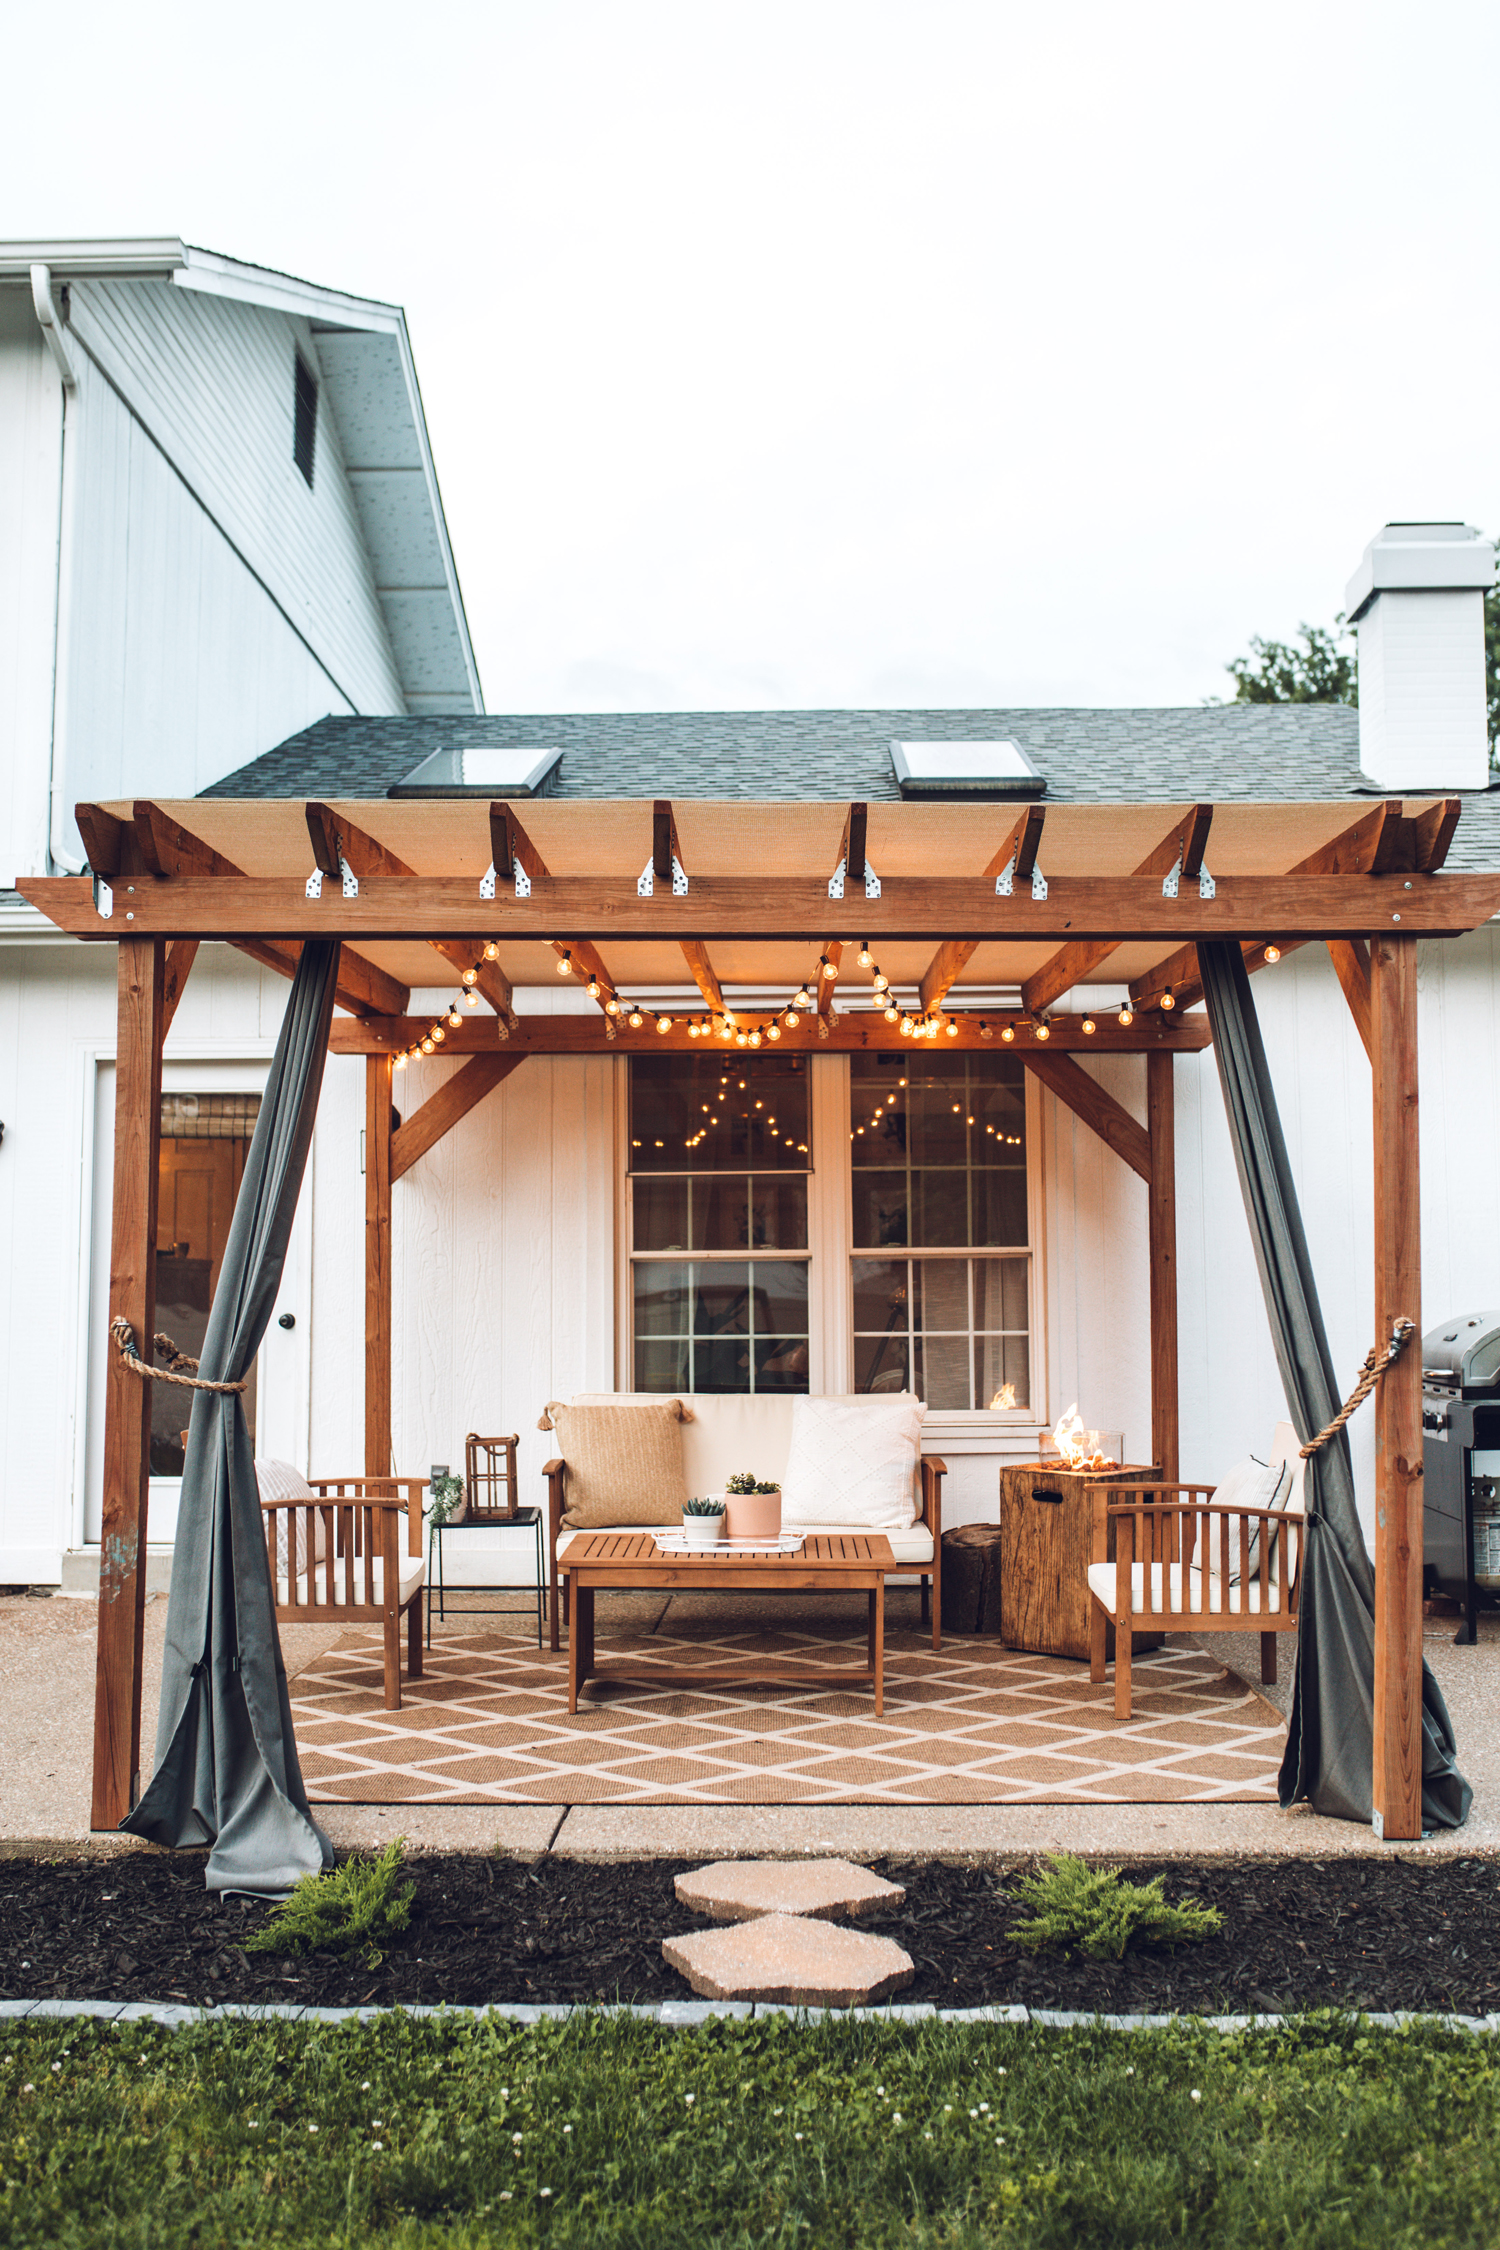
WHY BUILD A DIY PERGOLA?
A pergola is a great option for creating an affordable outdoor living space, while providing a bit of shade to a sunny backyard.
When we moved in, our house had a simple concrete patio in the back with no shade in sight. We knew we needed something that could help to block overhead sun and make this an enjoyable place to be. When there is no other shade in our yard, we know at least this cozy little square will provide some!
All my inspiration for our backyard on Pinterest centered around a pergola. I knew that would give our space a focal point and anchor. And also just a place to simply be when we are out back. My hope is that it would be an outdoor living room of sorts and provide a bit of sun shade!
You can absolutely choose to buy a pre-made pergola and simply install – there are lots of wood pergola kits available. However, DIY pergolas are often cheaper and are able to be customized to fit your space. Also, the overall quality will most likely be better than a store-bought kit, as lumbar and materials can be hand-selected.
HOW BIG IS OUR DIY WOODEN PERGOLA?
Our DIY pergola is 12×12.
We decided to build with all four wooden posts directly on top our existing concrete patio. It’s important to note before getting started that any surface variation will require you to make adjustments.
The first thing you will want to do is measure and map out how large you want your pergola to be!
NECESSARY MATERIALS TO BUILD A DIY PERGOLA ON CONCRETE:
- (4) Simpson Strong-Tie Post Base Brackets
- Hammer Drill (We used this affordable one from Wal-Mart!)
- Drill
- Circular Saw
- Masonry Drill Bits that match the bracket mounting hole size
- Tapcon masonry screws
- #10×3 inch SPAX exterior screws
- (4 – 8) Retrofit post bases
- 3-inch SPAX lag screws
- 1.5-inch SPAX exterior screws
- Simpson Strong-Tie H1 18-Gauge (hurricane ties)
- (4) 8ft. long 4x4s
- (15) 2x6x12 Pressure Treated Cedar Tone Pine
- 1x6x12 Pressure Treated Cedar Tone Pine
- Shade fabric (optional) & Staple Gun if so. I highly recommend this step, as it gives extra overhead shade and really completes the look of the pergola! The shade fabric we used has held up SO well.

STEP-BY-STEP FOR BUILDING YOUR DIY PERGOLA ON CONCRETE:
We used the footprint of this plan, so go have a look at that. BUT we used 4×4 posts instead of 6×6. It’s very helpful to view that plan to get visuals of the steps.
1. First step is to measure out your 10’ x 10’ square (this is the inside dimension, the roof overhang will make it 12×12).
Using your tape measure, measure out your patio square. You can make a chalk line to help visualize the space and get a feel for the size that’s needed. You will want to build this on a solid foundation! In our case, we are building on top of our concrete patio.
2. Install Simpson Strong-Tie post base brackets at the four inside corners of your 10×10 square.
Next step is to map out your post locations and then install base brackets for your pergola posts. Using these provides post anchors and allows moisture to escape out the bottom of the post, which prevents rot. This will also help with the overall structural integrity.

For the installation process, you will drill holes into the concrete with a hammer drill (we got ours at Wal-Mart for $18 and it did the job!) using masonry drill bits that match the brackets mounting hole size. Install brackets in concrete with Tapcon masonry screws (the blue screws in the photo below). Make sure you get the right diameter screws that fit through the bracket holes without allowing any room for it to wiggle. Fair warning though, they are not the easiest to screw in.
3. Set 4×4 pressure-treated, cedar tone pine posts in the brackets and screw together with #10 x 3 inch SPAX exterior screws, making sure the posts are plumb (straight up and down).
You’ll want to drill pilot holes for all screws, as this wood is tough and the screws are harder to get started while you’re working on a ladder.
4. Install 1 or 2 retrofit post bases per post. These add stability, as your posts are not flush with the ground or other brackets.

5. Cut angles on both ends of 14 the 2x6x12 pressure treated, cedar tone pine boards.
(See DIY template). You will use the remaining board in step 7.
6. Install 2×12’s to top of columns, one on the inside and one on the outside, making sure to space them properly both end-to-end and one on top of the other.
Mount Simpson right angle joist hangers for extra stability, if desired.
The top boards should be flush with the top of the column. Use 3 Inch SPAX lag screws.

7. To install angles, determine board length and angle of one end of each board.
The other end does not need to be as precise. Mount angled end to 4×4 and other end to inside of one of the top braces.

To give us the most open front, we ran the angles on the front corners, front to back. And the angles on the back corners, side to side (pictured below).

8. Determine spacing of boards across the top.
9. We mounted Simpson Strong-Tie joist hangers using 1.5 inch SPAX exterior screws. However, in materials list we are changing what we would use and suggesting you use Simpson Strong-Tie H1 18-Gauge hurricane ties.
10. Lay beams across joist hangers/hurricane ties and attach using 1.5 inch screws.
11. Install 2x6x10 face down across center of beams.
12. *optional* Attach shade fabric to top using a staplegun.
This is one of those finishing touches that you could skip, but I’d recommend you didn’t! We used two rolls of 6×15 brown shade fabric from amazon to act as a pergola roof. It has held up VERY well and hasn’t budged (even in high winds). Just use a ton of staples 🙂
It doesn’t keep rain out, but it gives much-needed shade without making it dark. Blends perfectly with the cedar! Highly recommend.
**This wood has not been stained. It’s the original cedar color. Do not wood stain or try to use wood sealer on your pergola for at least a year, as the wood needs time to dry out!
And that’s a wrap on our new patio space. We are so excited to have a shady spot for the summer months! I hope this has been helpful DIY pergola research for your own DIY pergola on concrete!
Thanks so much for stopping by!

Need more DIY Home Ideas? Check out these posts!
1) How to Paint Wooden Chairs (The Easy Way!)
2) Easily Re-finish Outdoor Wooden Furniture
3) Boost Curb Appeal on a Budget



I’m curious what this pergola cost you?
Hi Roxanne! This pergola cost us $400 in 2019. Unfortunately I cannot give an accurate estimate anymore, as lumber prices have gone up since then. But we did keep this plan as budget-friendly as possible! Hope this is helpful 🙂