

How to Completely Update Your Kitchen on a Tiny Budget
This post may contain affiliate links, please review my disclosure policy.
Hello, friends! Todays I’m sharing our DIY budget kitchen updates. If you’re looking to update your kitchen without a big budget or even crazy DIY skills to do it, you’re in the place!
This post is filled with small changes that will make HUGE impact and have helped us to create our dream kitchen.
Here is what we were able to do to make a serious impact in our kitchen without spending a ton of money!
As a BONUS, all of our budget kitchen updates have been around $1500 total combined!
**I no longer have a home instagram account, but you are welcome to message me on my business instagram account if you have any questions! @courtneysmithphoto

11 DIY Budget Kitchen Updates | How to Update Your Kitchen on a Budget:
11 Budget Kitchen Updates (We did all of these for less than $1500 combined!)
This post includes affiliate links. For more info visit my disclosure policy.
1. Create open space (if needed).
Creating open space is a great way to make your space feel bigger. Our kitchen had a row of cabinets over our bar area that made the an already small space feel really small and closed off.
The first thing we did in our kitchen after moving in was take out those cabinets and sell them on Marketplace!
We had enough kitchen storage without them, and it opened up the kitchen so that we could see into living room.
This alone made a huge difference in our kitchen!

We also removed our the microwave above the stove and built an oven hood to simplify the space (will talk about this in just a bit!). We have since gone back and converted a lower cabinet into a shelf for the microwave. More on this below!

2. Give your kitchen cabinets a fresh coat of paint!
I won’t pretend this was a lot of fun to do ourselves. See the full tutorial for painting kitchen cabinets here!
Painting cabinet doors took us several long days of hard work. But the money that you will save to paint them yourself instead of hiring out or even replacing the cabinets altogether is WORTH IT! It’s absolutely the cheapest way to get “new cabinets.”
On average, you are looking at spending $2k to hire someone to paint your cabinets. To replace them altogether, the average cost is around $6k.
So in comparison, we painted our white cabinets for less than $100.The paint color can be customized, but we use Pure White straight from the can. We’ve been pleased with the look of this, and it has the perfect amount of glossy-look in the finish, so it goes on looking clean and “professional.”
UPDATED TO ADD: I’m actually not going to recommend to you the paint we used because it didn’t hold up well. 5 years later, we just re-painted our kitchen cabinets and are THRILLED with the results using Sherwin Williams Urethane Trim Enamel.
See the full tutorial for painting kitchen cabinets here!
3. Paint the countertops (yes, really!!)
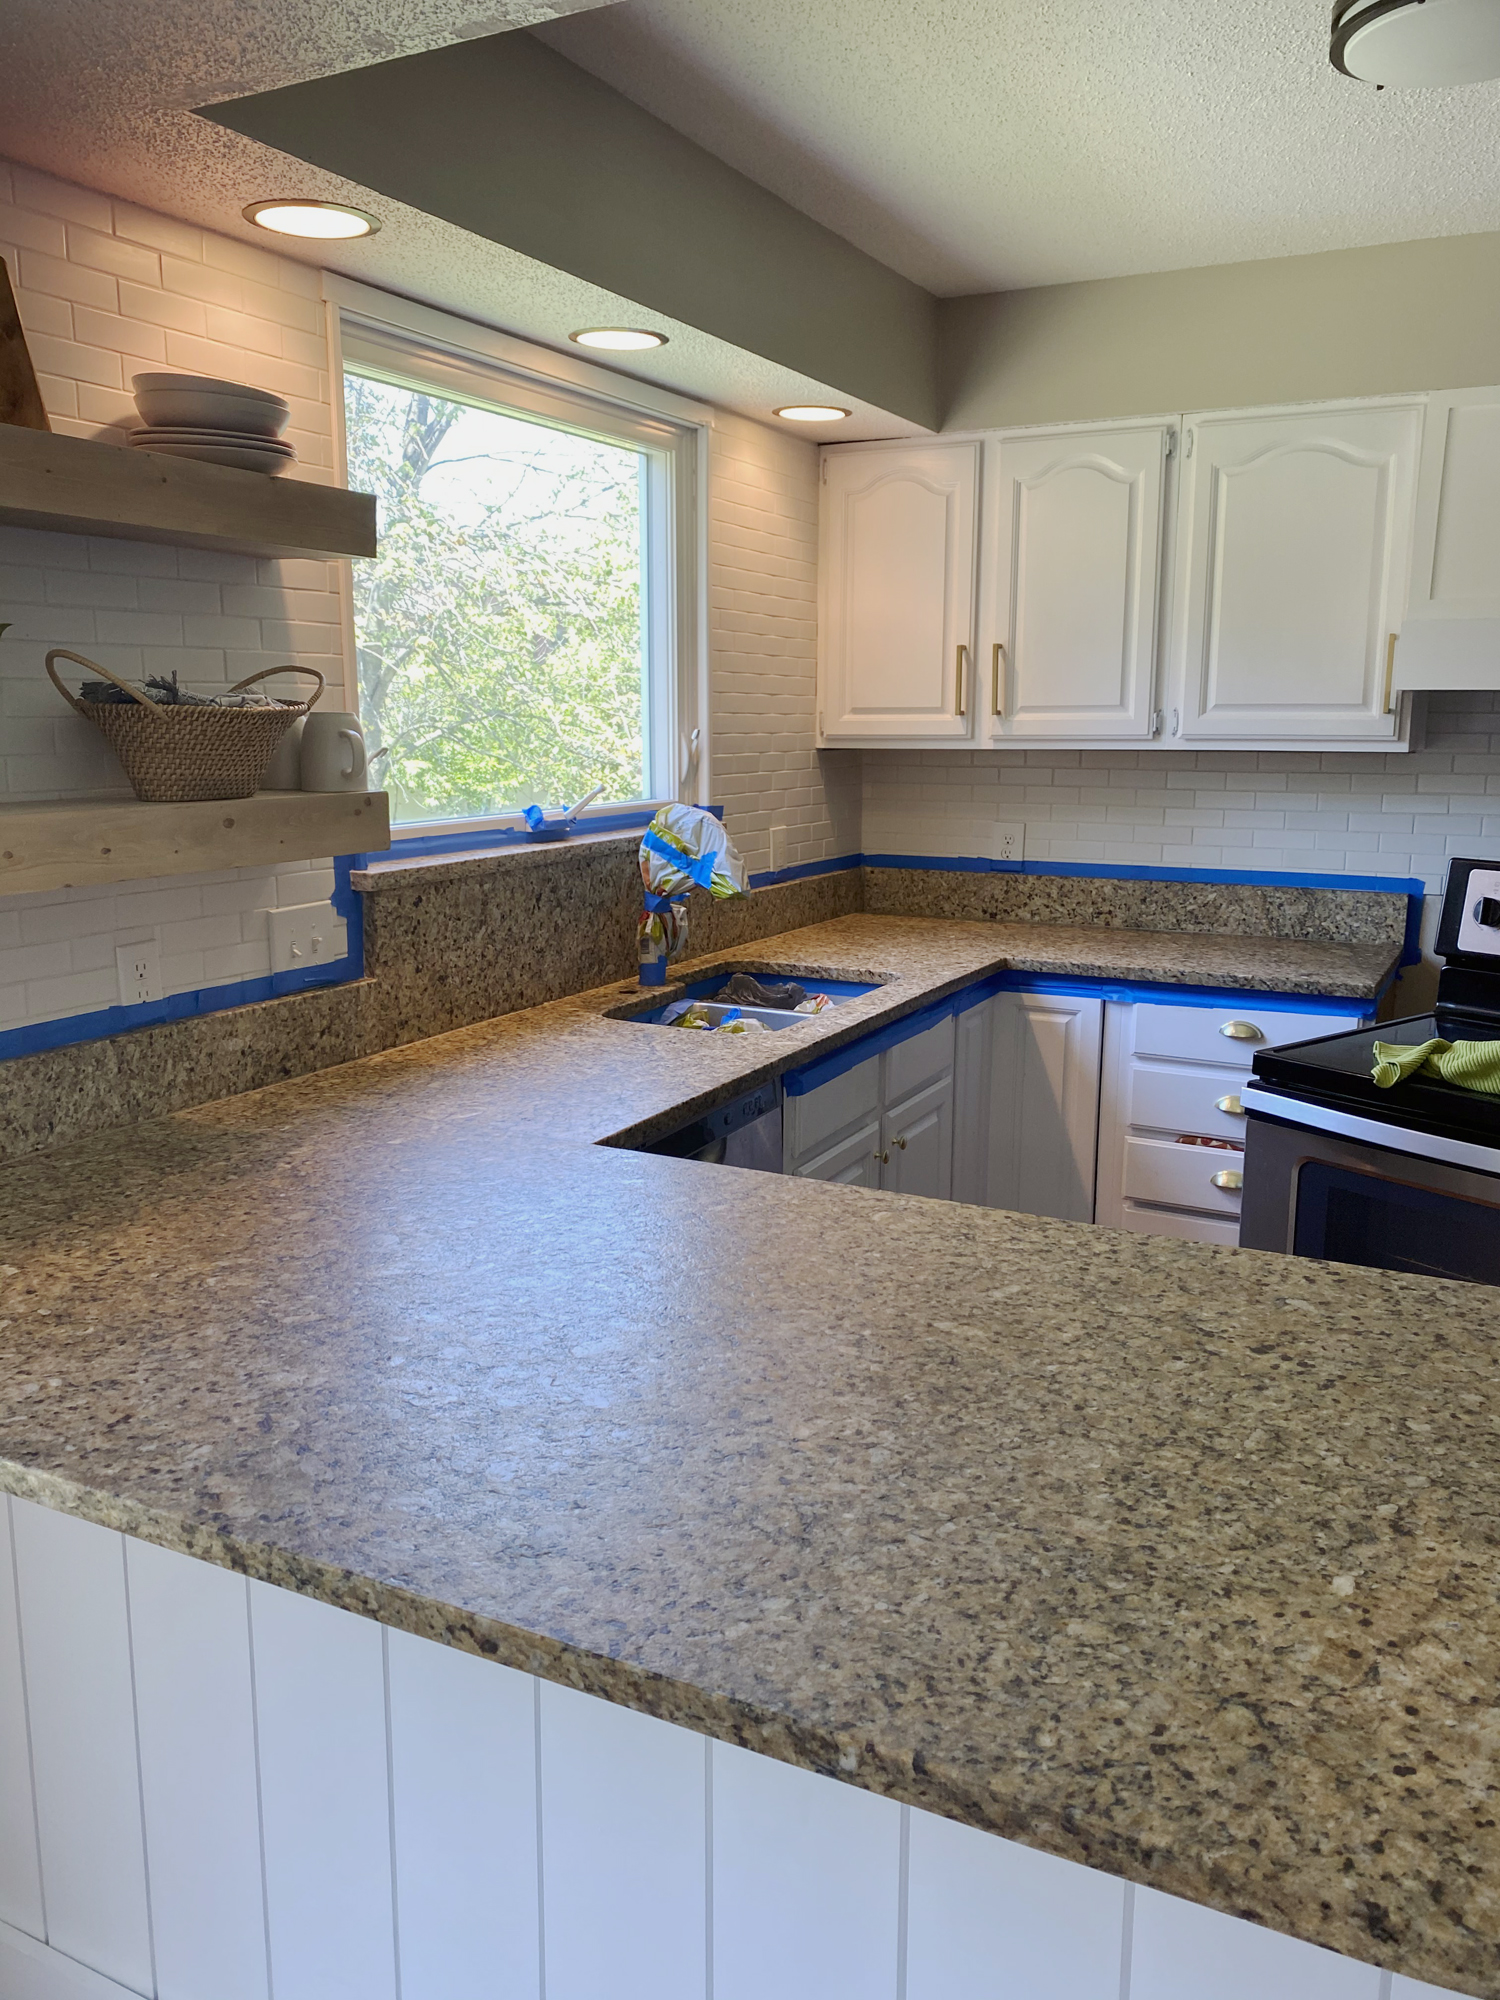
We painted our brown granite countertops with appliance epoxy and it has held up BEAUTIFULLY. Solid and durable, and the final result doesn’t look painted. AT ALL.
This little refresh was less than $50 as opposed to new countertops that we just don’t have the money for currently. I talk about the whole process and give step-by-step here! This honestly feels like a new countertop altogether.
This can be purchased at Home Depot or the ever beloved Amazon.
I recommend reading the blog post for the full tutorial if you have questions about this process. I detail upkeep and all that jazz 🙂
In terms of all of our DIY budget kitchen updates, this was easily the most transformative.
I also have a 2 year update on these countertops here.
Since painting our cabinets, so many new tutorials for painting countertops have come about. I’m still of the mindset that this is the absolute easiest way to paint your countertops and have them actually hold up.

I mean can we just talk about the power of paint!
3. Replace Hardware
Replacing hardware can really do wonders for updating a space and truly change the look of your kitchen.
We got ours on amazon and are very happy with them.
I’ve also seen people have success in spray painting their current hardware to save EVEN more money. However, I tried this on a few of our cabinet knobs, and ultimately didn’t like finish and look that the spray paint provided. I wanted something that would hold up and withstand the test of time (and kids!), so we opted to just replace them altogether.
Something to keep in mind is that you will want your hinges to match your hardware. The recent home trend is to have “hidden hinges.” However, that would have involved filling old holes and drilling new ones (basically a ton of work), so we opted to order white hinges from amazon that would blend in with our white cabinet paint.
4. Add or replace backsplash
Again, you’ll save so much money by doing this yourself and sticking with something simple and timeless. We chose white subway tile for the affordability and classic quality.
That being said, we had never done it before, and I will say, it was a learning experience for sure! Looking back, I wish we had taken more time to know exactly what we were doing before we got started. The two biggest tips I can give you if you’ve never done this before — 1) Use Spacers and 2) Choose a white or light colored grout to hide mistakes!

Our house didn’t have any backsplash when we moved in. And because we had taken out the row of cabinets above the bar area, we opted to take the backsplash all the way up the wall. This wasn’t necessary, but in my opinion it has more of a “wow” factor to go up the wall. Obviously, not every home will even have the option to take backsplash higher. This is just what worked for our space.
5. Consider open shelves or hooks of some kind.
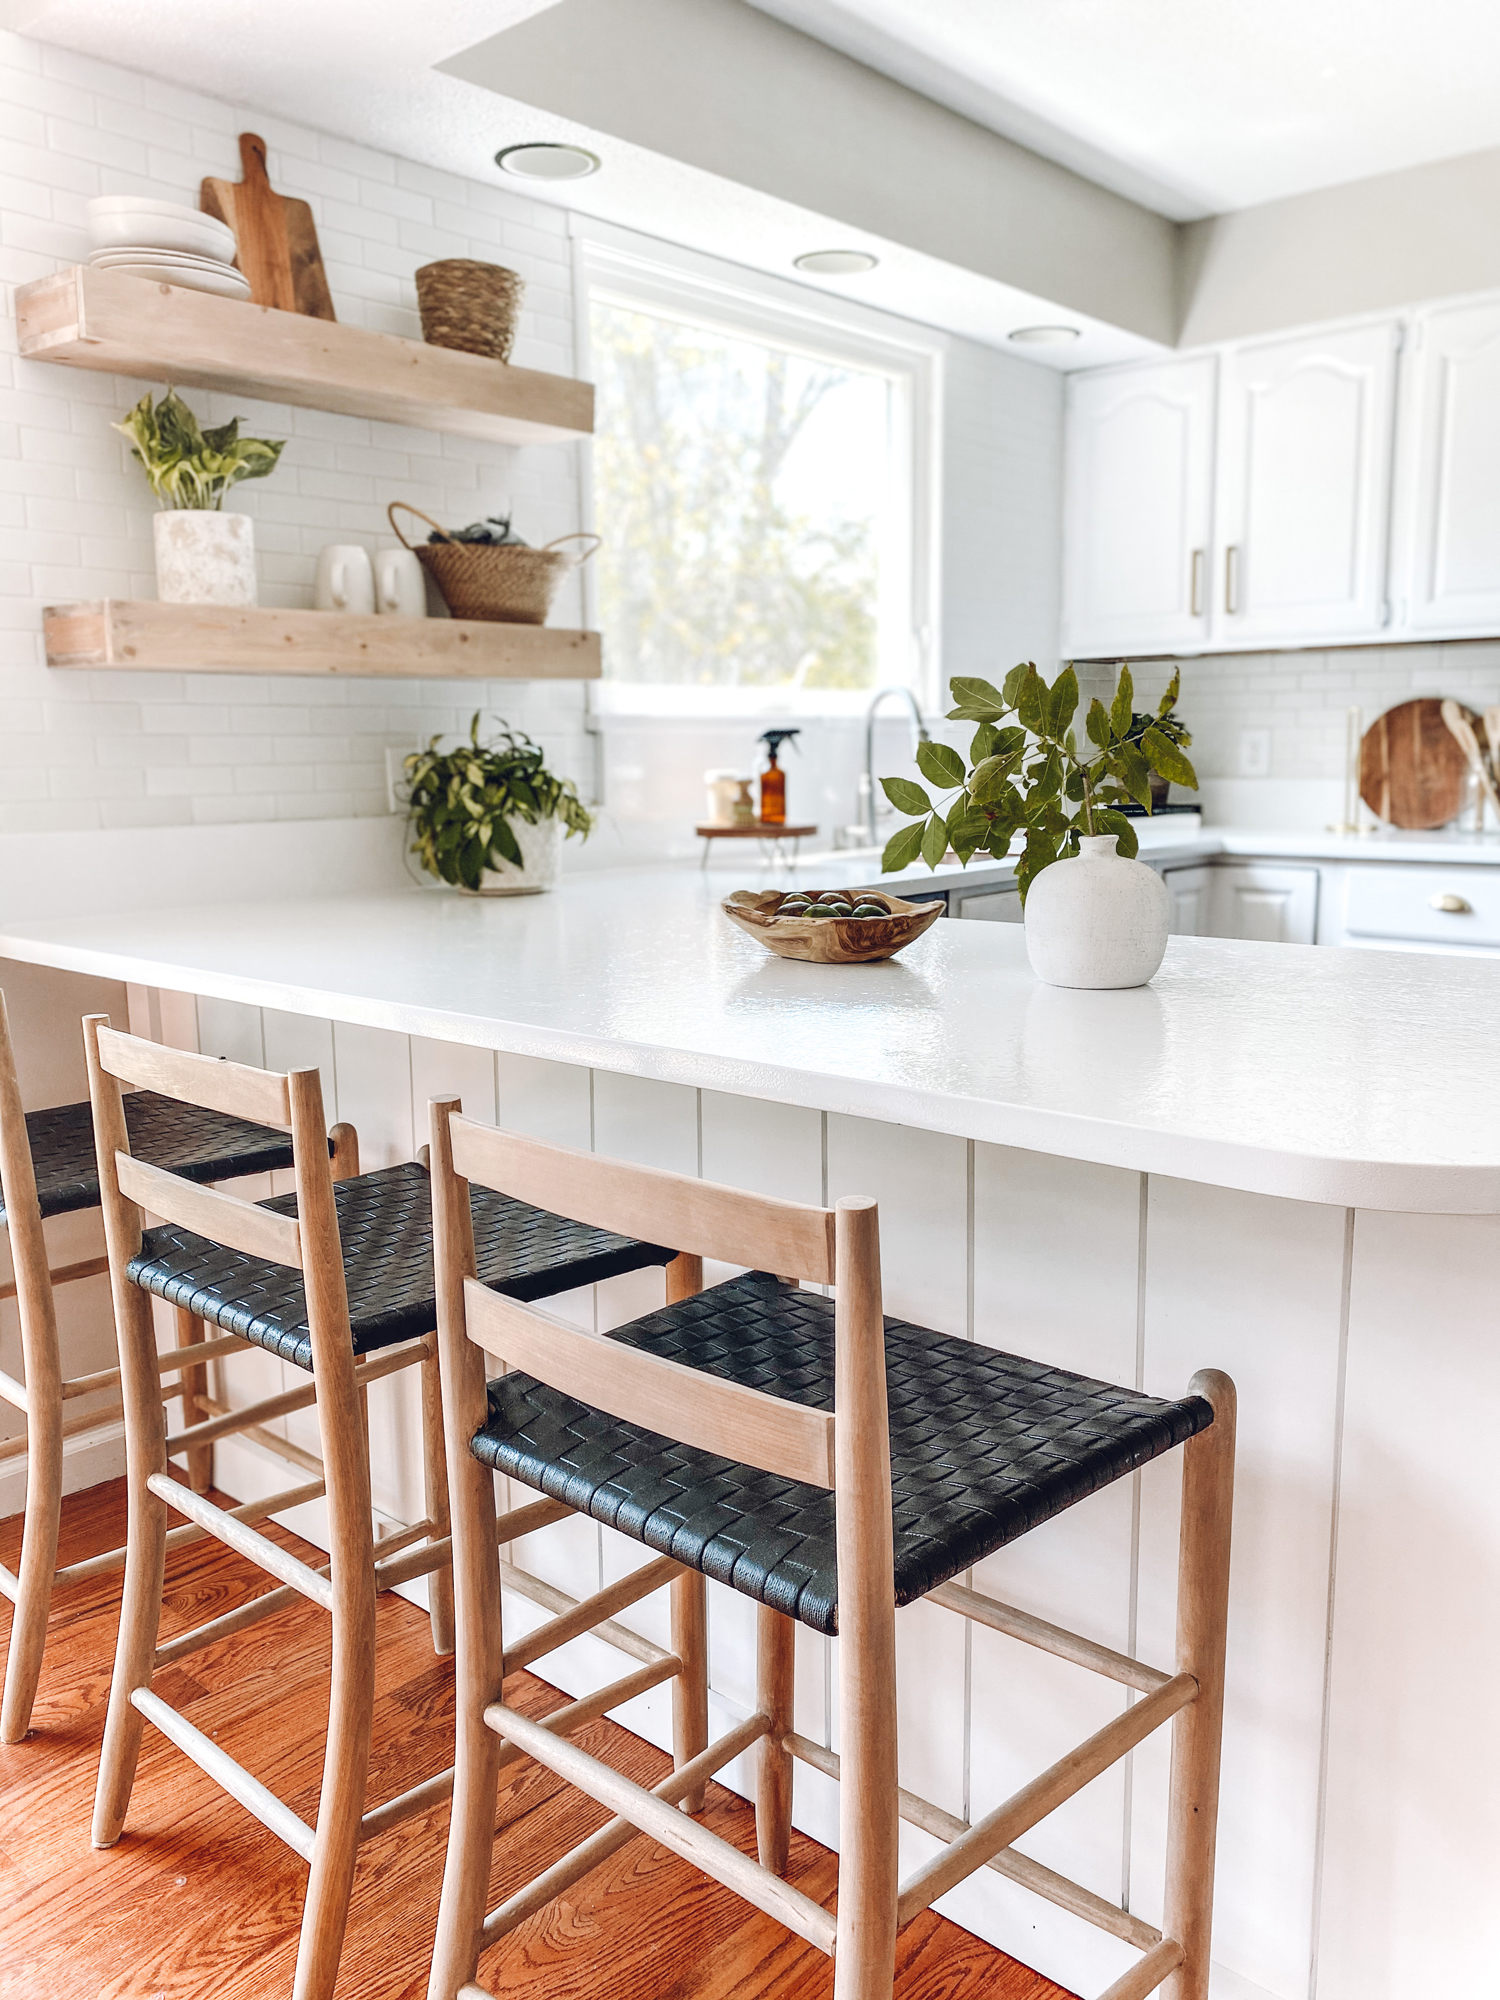
We were able to put two floating shelves into the backsplash in the section where we removed cabinets.
It created a beautiful space where we can display decorative pieces that fit the style of our home. These give our kitchen a “focal point.” These instantly added so much character to our kitchen, and I love that I can change decor in and out to shake up the style.

We followed this tutorial and modified it to fit our dimensions.
We stained the shelves with Minwax White Wash Pickling + Weathered Oak stain with just a bit of Special Walnut mixed in (Minwax brand).
I have a tutorial on this stain combo here.
6. Frame out windows.
You can see in the photo above where we framed the windows out with wood to give the whole kitchen a more complete feel.
7. Add visual interest!
We added vertical shiplap to our kitchen island (the area underneath our bar. Originally it was just thin plywood that we painted white when we moved in.
This was a cheap and simple DIY that did so much for adding a little something to the space when viewed from this angle.

You can also do this by having pretty and practical statement pieces on your countertops. I.e. A pretty crock for cooking utensils, recipe books, cutting boards, plants, etc.

8. Add a pretty accent rug.
This sounds small, but it actually makes a big difference! I like to find our smaller rugs Home Goods. You can find so many options for cute, smaller rugs there — usually between $15 and $30. This one is a LoLoi and I found it for $15 at Home Goods!
Also, sorry not sorry for the cute baby 🙂

9. Replace flushmount lights.
If you have a flushmount light in your kitchen, consider upgrading. These really can go a long way in upgrading your kitchen and adding character and charm to the space. Linking a few affordable ideas below.


10. Build an oven hood.
I’m putting this diy kitchen renovation at the bottom of the list because it wasn’t necessarily a *budget* project.
We were able to complete it for around $350 though, so not bad by any means!
We removed our microwave from above the oven and built an oven hood above — find the tutorial here. It wasn’t necessary to transform our kitchen, but it definitely made it look way more custom and added a ton of character.

My most asked question about this is where we put the microwave. We converted a lower cabinet into a shelf for the microwave to sit on, as pictured above!
11. Replace your faucet!
Our new kitchen faucet brought so much warmth and gave an instant upgrade to our kitchen. We chose the Kraus Oletta High Arc in Champagne Bronze.

When I see the before and after photos side by side of our DIY budget kitchen updates, I’m reminded that it really does feel like a new kitchen compared to what we started with.
And that’s it, friends! Hopefully our DIY budget kitchen updates give you some new ideas and help you love the look of your kitchen!
Until next time,

You may also be interested in these posts!
10 Tips for Decorating Home on a Budget
Our Favorite Amazon Kitchen Items
Epoxy Countertops (2 Year Review)


I just love everything you both have done its amazing & beautiful & practical & wooooooooooooowww factor
God Bless you both & ur family
Keep up the greeeeeeaaatttt work!!❤?❤?❤?❤?❤?⭐⭐⭐⭐⭐
Oh my word, well thank you so much Eithena! This is so kind. It’s been a slow and steady process. It’s so nice to see it all finally coming together!
Your kitchen looks absolutely amazing and I appreciated the simple and organized way you explained your remodel. I’m looking to do the same thing with about the same budget so this was great, thank you for linking in all the references and step by step guides. I need all the instructions and tips so I truly appreciated everything about this post. God bless!