Dollar Tree Gallery Wall
This post may contain affiliate links, please review my disclosure policy.
Hey friends! Today I’m sharing how I was able to complete my Dollar Tree gallery wall for a little more than what just ONE of the frames I originally wanted would have cost. Here’s how!


You didn’t think I’d make it much past the first week of a stay-at-home order without some sort of project did you?! 😉
I bought a bunch of 11×14 frames last time I was at Dollar Tree, and then tucked them away in our garage for the day I figured out what project I’d like to use them for. Well the day has come!!
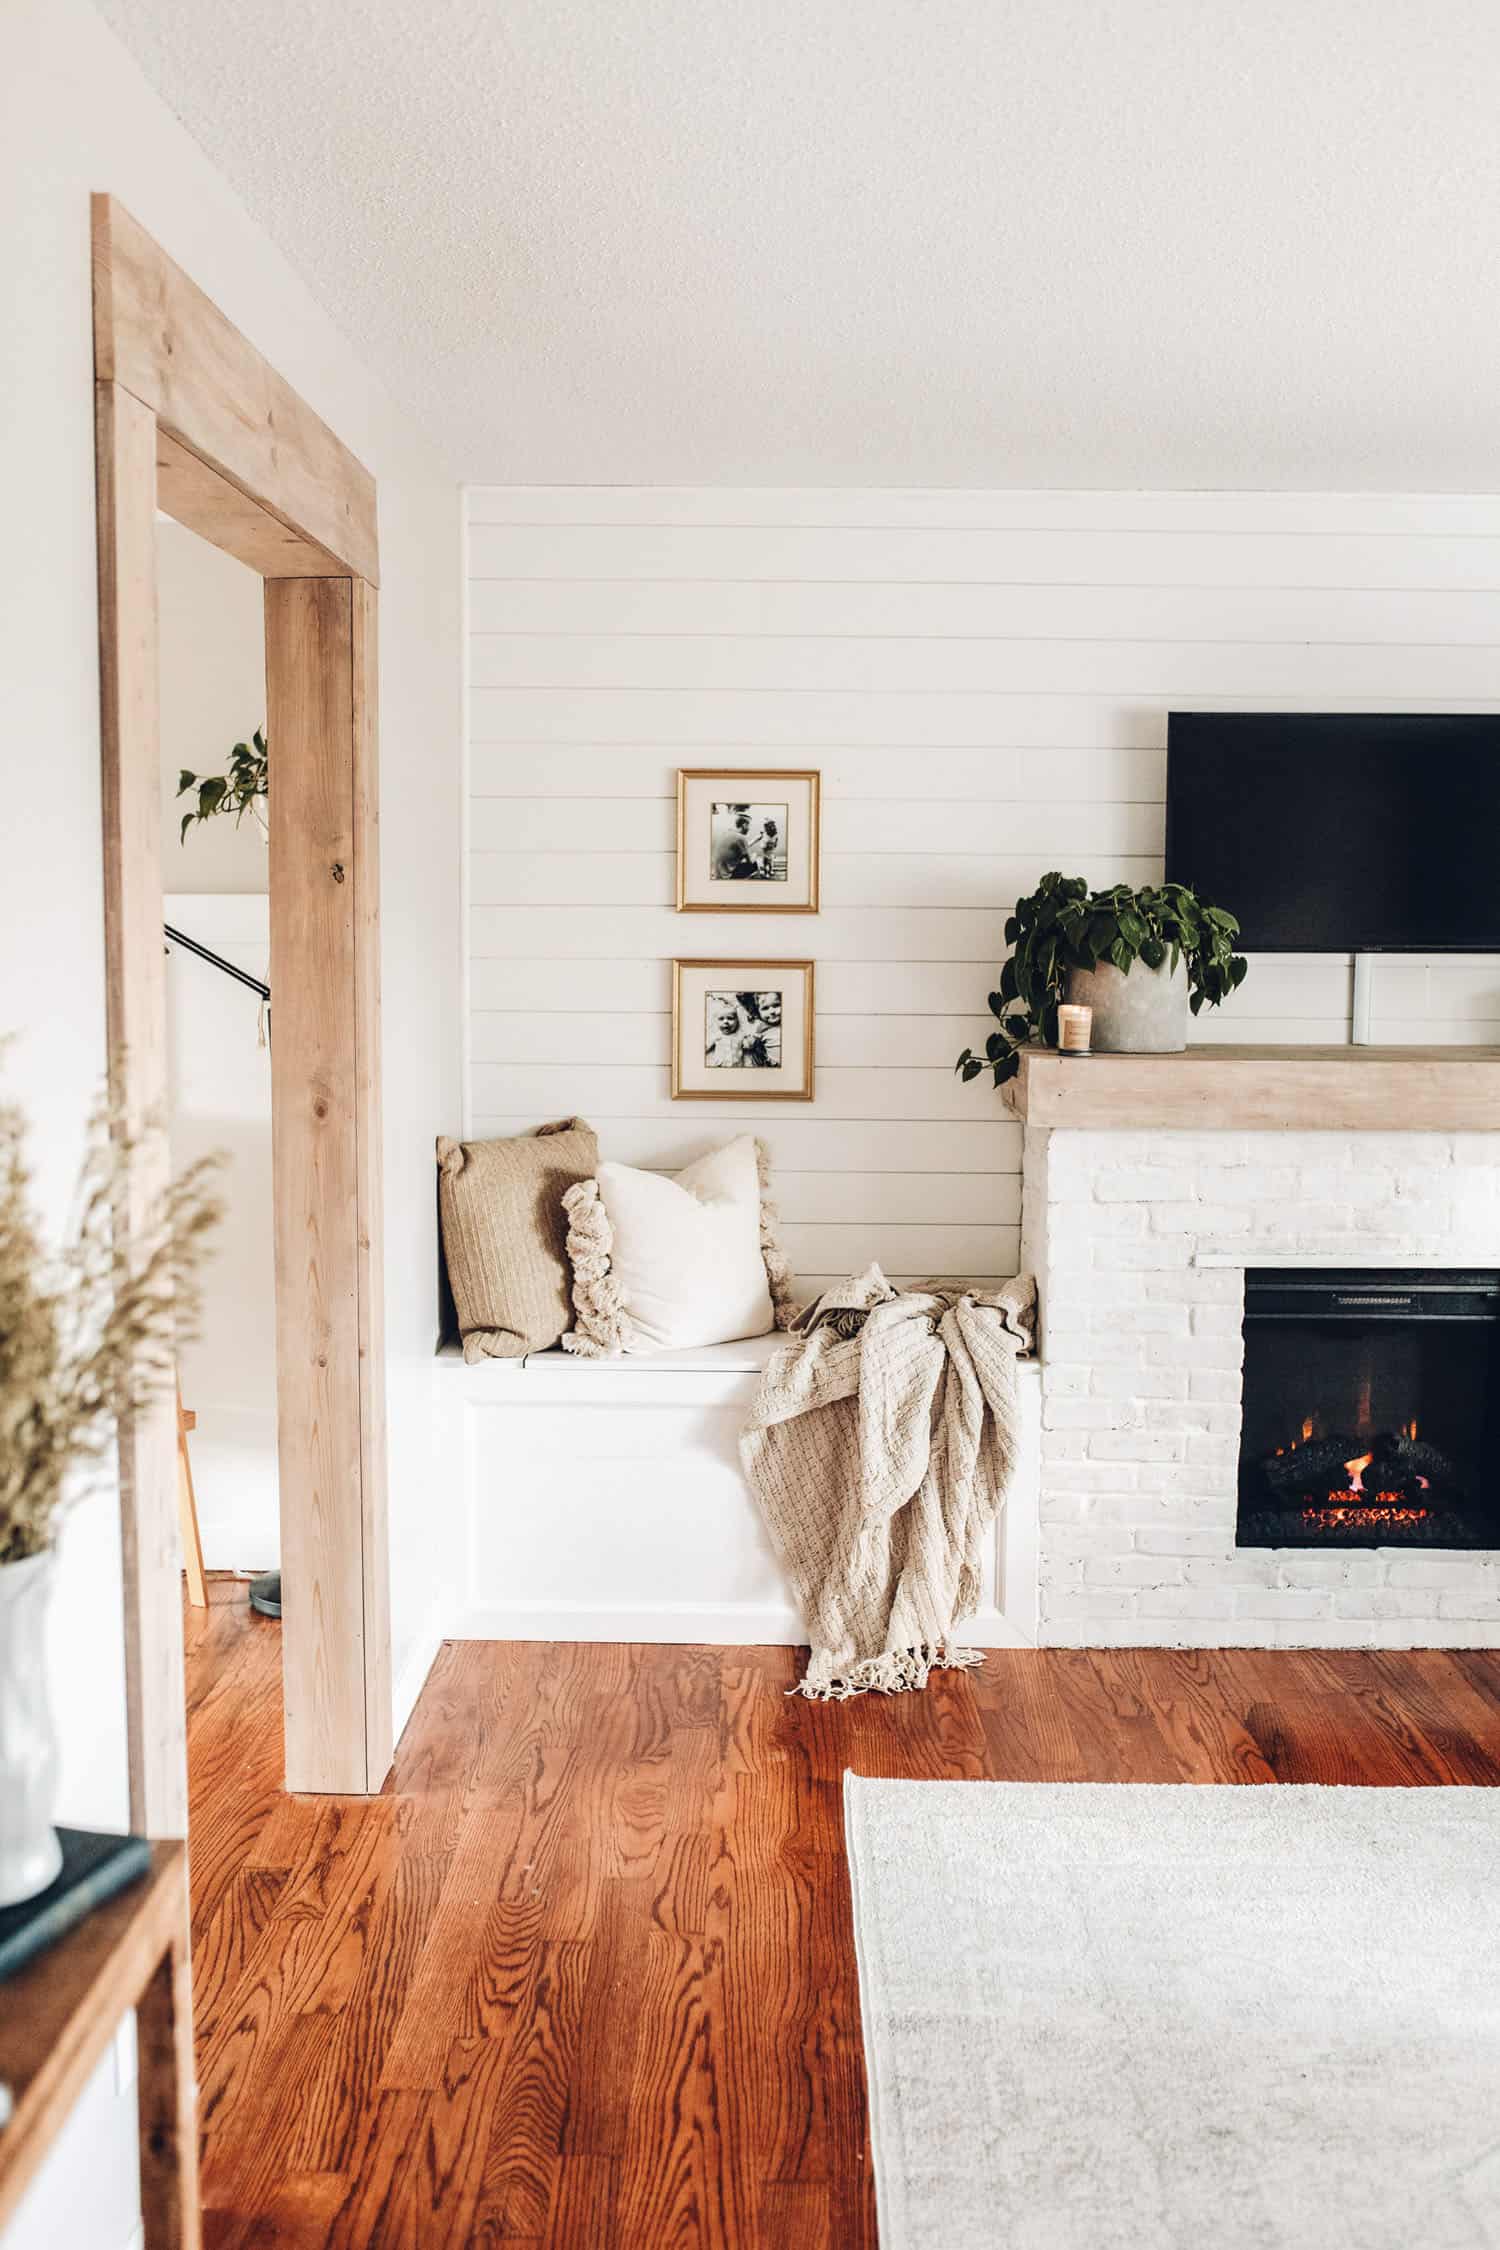
I’ve been brainstorming ways to make our bedroom a little more “us” and honestly, just more…something! It’s a shame, but I haven’t spent much time making our bedroom into an inviting place yet. I’ve been focusing so much on the main floor of our home that our upstairs is pretty overlooked. BUT, all of that will hopefully be changing in the coming months!
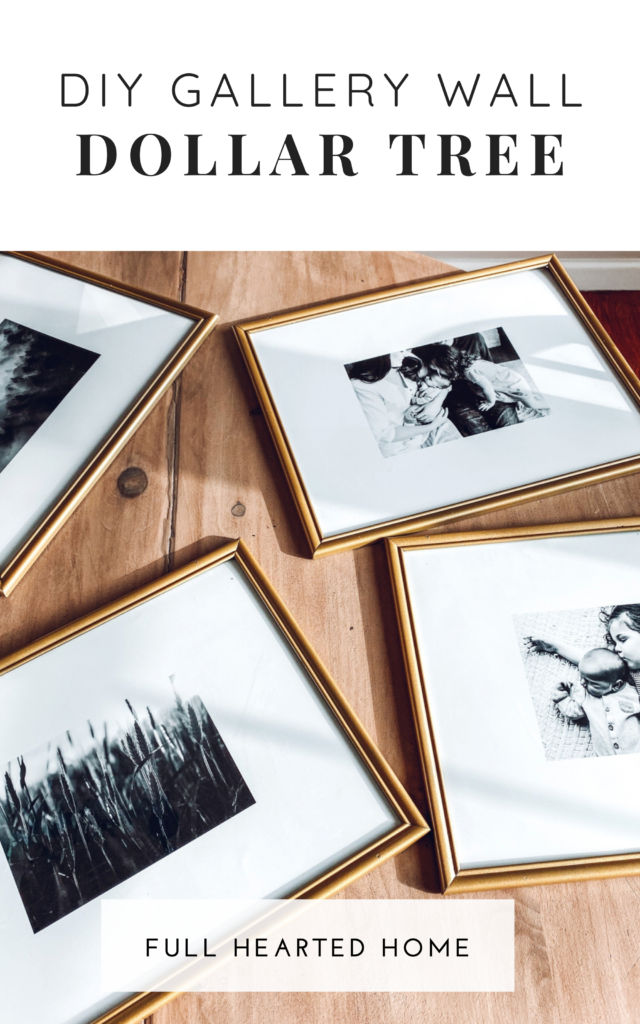
The first thing I decided to do in our room is hang 4 horizontal 11×14 frames above our bed. Classic, symmetrical, and helps to tie the room together! To keep it budget-friendly, I decided to use the the $1 11×14 frames and spruce them up a bit.

This $16 11×14 frame with a 5×7 matte from Target was my inspiration, so this is what I did to achieve it!

How to create a gallery wall from Dollar Tree Frames:
1. Spray paint frames.
I removed all of the glass from the frames and spray painted the outside frame of each. With a stay-at-home order in effect, obviously I couldn’t run to the store for spray paint, so I used what we had on hand. We just so happened to have a can of “Pure Gold” by Rustoleum in the garage… so a gold gallery wall it shall be! For these four frames, it took over half the can get a nice, even finish all over. So if you’re doing a bigger gallery wall, I’d recommend 2 cans to be safe!


2. Design faux matte photo & order prints.
I ordered our prints from walgreens with a faux “matte” designed around the photo to give the look that I want. I did this with photoshop, but discovered that for those without photoshop, you can do this completely free on photopea.com! I’ll give instructions for photopea below —
- On your computer, visit the site and select “New Project”
- In the left hand side of the screen that pops up, name your project Matte
- Change the drop down box next to width to inches (there’s a little “px” with a drop down menu). Change width to 14 inches and height to 11 inches. Or vice versa if you’d like your print to be vertical instead of horizontal.
- Change DPI to 300 (directly underneath the height specifications. Your settings should look like this —

- Click “Create”
- Go up to “File” in the top left corner, and then select “New”
- Name this one “Photo”
- Change px to inches again, and then change width to 7 inches and height to 5 inches (this is if you want larger matting like I did). If not, you’ll want to size it to be 10×8. Again, these numbers are vice versa if you’d like your prints to be horizontal.
- Change DPI to 300 and then click “create.”
- You should now have two tabs — one that is your “Matte” and one that is your “Photo.”
- Click on or remain on “photo” tab and then go up to the top left corner and select “File” and “Open & Place.” From here, select the photo you’d like to use.
- Click on the boxes on the outside edge of your photo, and then drag to fit your photo to the 5×7 frame.
- Now go up to “File,” and then “Export as,” and then click JPG.
- Drag “quality” slider up to 100% and then hit “export.”
- Click on your “Matte” tab
- Click on “File” and then “Open & Place” — selecting your recently downloaded photo file.
- Drag the photo to the center of the frame, until you see a red cross across the middle of the photo. This means it’s completely centered.
- Now your faux matte is complete! Go up to “File” and “export as,” and then select JPG (your quality slider should still be at 100).
- Your print ready file is now saved as “Matte” on your computer.
- Upload this directly to any printing company as an 11×14 (making sure to switch the orientation to horizontal when you do so, if you designed horizontally) and you’ll have yourself a beautiful, faux matte print! It should look like the example below.
Also to note if you’re doing a b&w gallery! If the photos you are using aren’t already black and white and you’d like them to be, you can convert them in photopea by going up to “Image” in the top left corner, “Adjustments,” and then select “Black and White.” OR you can do this when you upload your photos to your printing company (I use Walgreens). There is an option to edit and apply a b&w filter after you upload!
PRINTING TIP — I recommend printing through walgreens if you are trying to keep it as low budget as possible. They usually have coupons that take prints and posters down to half price!

3. Trim down prints and insert into frames!

The frames were just a tad too small for the 11×14 prints. I trimmed off about 1/8th of an inch on all 4 sides, and then placed them in the frames.
I’d say these came out looking even better than I expected! They are also super light, so I was able to hang them with command strips. A double win, for sure!


Looking for more affordable DIY projects? Check out these posts!
A List of DIY Home Projects Under $100
Dollar Tree Spice Cabinet Organization