DIY Aged Vase (Or Found Pot)
This post may contain affiliate links, please review my disclosure policy.
Hey friends! I’m here today with a DIY Aged Vase tutorial. I have been loving this trend of aged pottery floating around the pinterest world. Anything that adds character to a home, you can sign me up for!
Here is how I aged a brand new vase to make it look like a found pot.
Can I just say, I was STUNNED by how easy this was and how much I LOVE the final product! The process is repetitive, but so easy. It took about 40 minutes total (including a 30 minute drying time for the mortar) and cost us $3!
So with no further ado…. here are the steps I took to age the vase that sits in the center of our breakfast table!
What You’ll Need to Age a Vase:
You can actually see video highlights of this on my instagram here!
- Old (or new) vase or pot
- 1 or 2 cans of flat finish spray paint (I only used 1)
- Gloves
- Dirt
- Piece of sandpaper
- *optional* Mortar (I’ve seen people use mud as well. Anything that will dry and add texture will work!)

How to make a vase look old:
1. Lay out something to create a flat surface in your yard. We have a dry/dirt area on the side of our house that I just laid brown bags over to create a work surface. If you don’t have that, a cardboard box or even newspapers can be helpful!
2. Collect a bowl full of dirt (lol)
3. Apply gloves!
This is the vase we started with. Not an unattractive vase by any means! I was just ready for a change.

p.s. If you need a visual of any of these steps – you can see my instagram highlight here !
1. Spray paint your vase in desired color. I chose flat black. This coat doesn’t have to be perfect, but cover the pot or vase.
2. Immediately afterwards, while spray paint is still wet; grab a handful of dirt and spread it all over the pot/vase with your gloved hand.

3. Another coat of spray paint.
4. Another coat of dirt.
5. Another thin coat of spray paint.
6. *optional* Smear a thin coat of mortar all over to give more texture. Again, mud could also work here — or anything that can be applied that will dry and add a little more texture!
Apply another coat of spray paint and then let dry. I sat mine out in the sun and it was dry enough within 30 minutes.


7. Using a sheet of sandpaper, sand down the excess mortar.
8. Another coat of spray paint.
9. Another coat of dirt.
10. And FINALLY, your final coat of black spray paint. I told you LOL — repetitive, but easy!!!
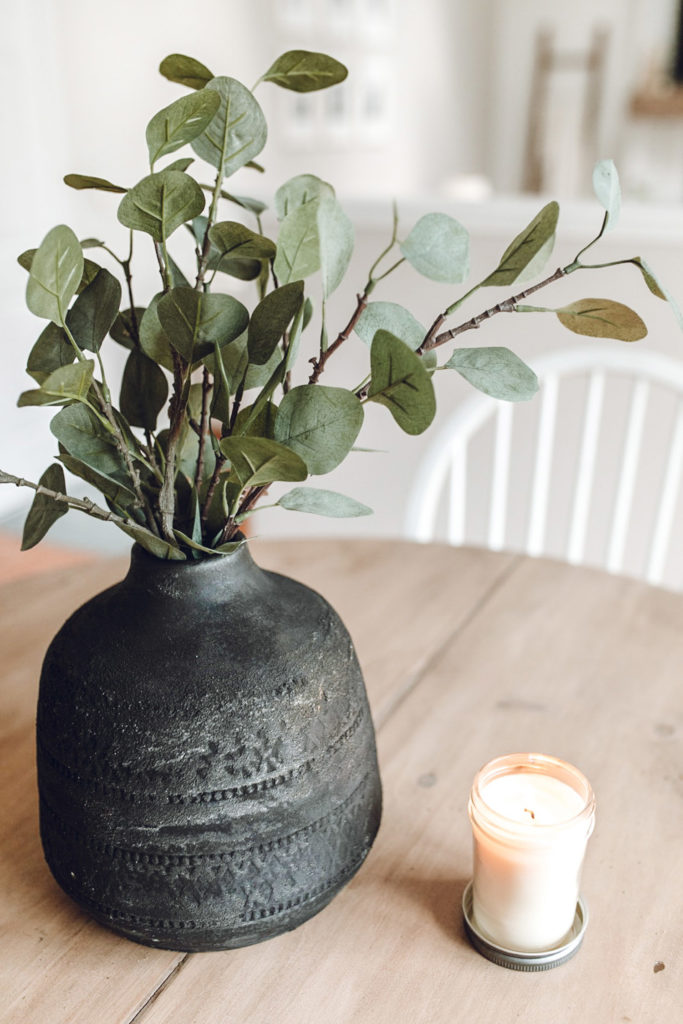
And the finished product for the DIY aged vase!


Interested in other easy DIY projects? Check out these posts!
How to Paint Wooden Chairs (The Easy Way!)
NOW… I’m off to age every vase we own!
Until next time,